How to Dry Drywall After a Leak
Introduction
The process of dealing with a water leak that affects your drywall can be stressful and challenging. Properly drying the drywall after a leak is essential to prevent mold growth and maintain the structural integrity of your walls. In this guide, we'll walk you through the steps to effectively dry drywall after a leak, ensuring your home remains safe and sound.
Understanding the Severity of the Leak
Before you begin the process to dry the water damaged walls, it's crucial to understand the severity of the leak. Whether it's a burst pipe, a small hole, or a flood, the extent of the damage will determine the necessary steps for effective drying.
Assess the damage by inspecting the room and identifying any standing water, damp walls, or hidden moisture in the ceiling. If there are signs of a damp wall, it is essential to take immediate action. Understanding the severity will help you choose the right approach and tools for the job.
Immediate Actions to Take
When you discover a leak, it's vital to act quickly and start drying. Turn off the water supply to prevent further leakage and shut off the electricity to the affected area to avoid any electrical hazards.
Open windows and doors to increase air circulation, which helps start the drying process immediately. Removing standing water and any wall coverings as soon as possible is crucial to prevent further damage to the drywall and other structural components.
While these initial steps are important, major water damage often requires professional intervention. A restoration company has the expertise and specialized equipment needed to thoroughly dry your drywall and prevent long-term issues like mold growth. Contacting a restoration company promptly can save you time, money, and the hassle of dealing with extensive repairs.
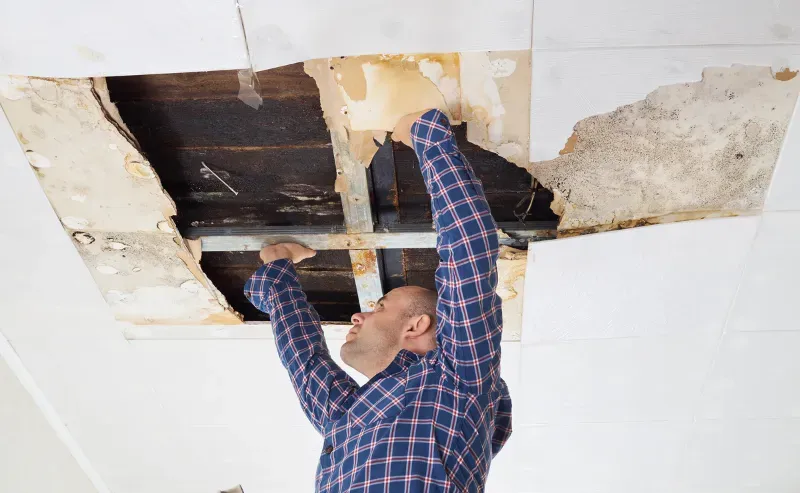
Assessing the Damage
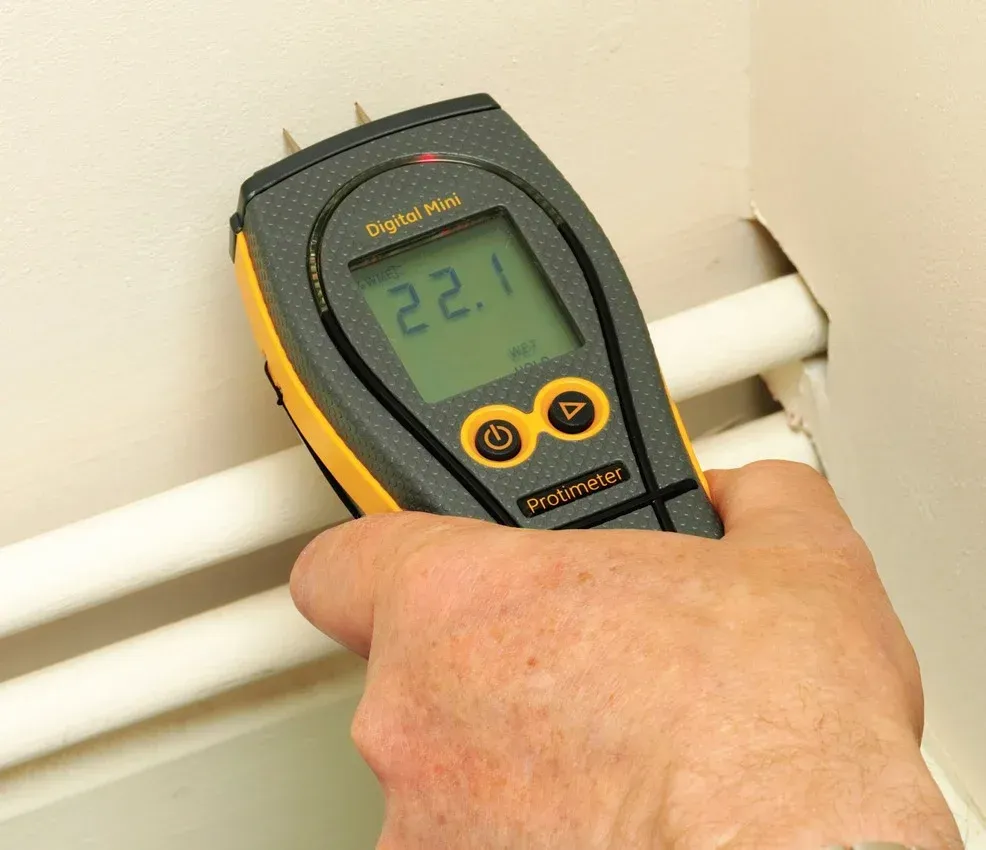
Inspect the affected drywall for visible signs of damage. Look for wet spots, damp walls, and hidden areas that may have absorbed moisture. Listen for pipe leaks in the walls. Use a moisture meter to determine the extent of the water damaged walls and take note of moisture levels.
A moisture meter will help you identify areas that need more attention during the drying process. It's also essential to check for structural damage, such as warping or swelling, which can indicate severe water damage.
Removing Standing Water
Use submersible pumps, wet vacuums, or absorbent materials to remove standing water. This step is crucial to prevent further damage. Use towels or sponges to absorb moisture from small damp spots. Remove and throw away any wet insulation. Insulation soaked from water leaks cannot be saved.
For larger areas, submersible pumps or wet vacuums are more effective. Ensure all water is removed before moving on to the next steps.
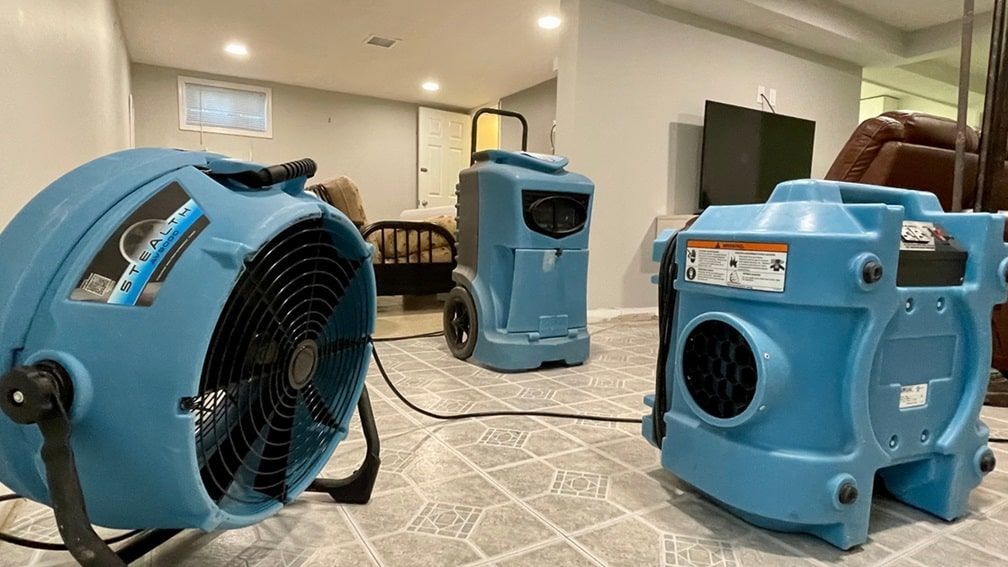
Increasing Air Circulation and Using Dehumidifiers
To speed up the drying process, set up fans and air movers to increase air circulation in the affected area. Position them strategically to direct airflow across wet areas, and open windows and doors for fresh air. Additionally, use dehumidifiers to remove moisture from the air and maintain low humidity levels for dry air. For larger areas, use multiple dehumidifiers and regularly empty their water collection tanks to ensure efficient drying. Use a drying technique which allows as much air movement in the room as possible.
Utilizing Warm Air for Drying
Warm air can significantly speed up the drying process. Use heaters or air blowers to help evaporate moisture from the drywall. Position heaters or blowers near the affected areas to direct the air onto the wet drywall.
Be cautious not to overheat the area, as this can cause additional damage to the drywall and other materials.
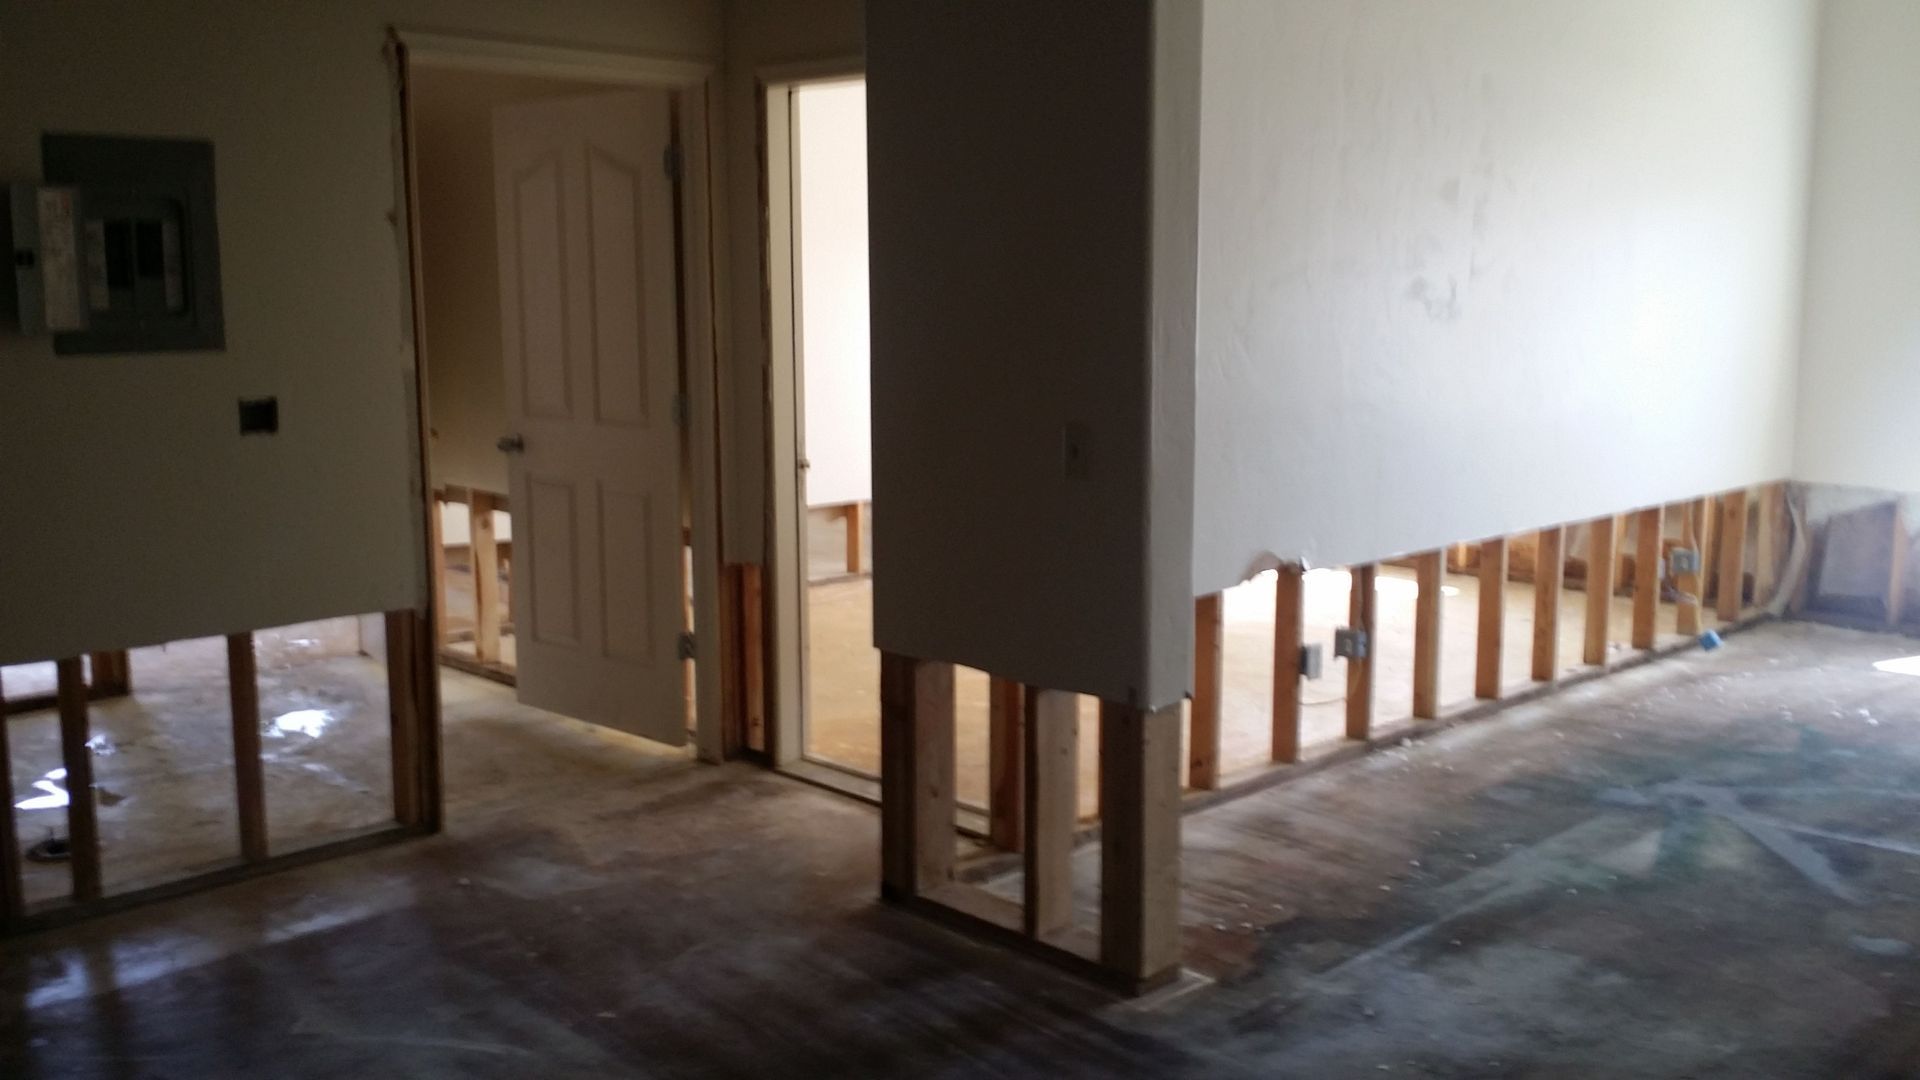
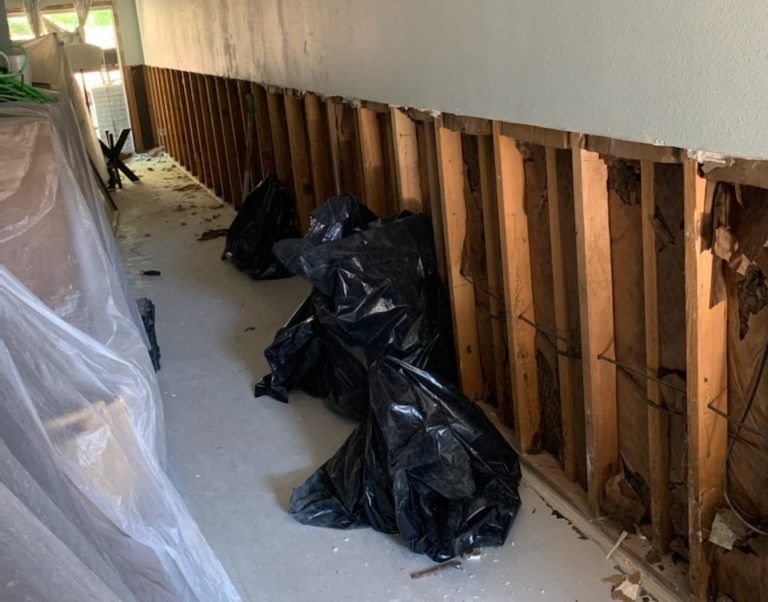
Removing and Replacing Damaged Drywall
If the drywall is severely damaged, it may need to be removed and replaced. Cut out the affected sections and replace them with new drywall to maintain the structural integrity of your walls.
Use a utility knife or drywall saw to cut away the damaged sections, and be sure to remove any mold-affected areas. Replace the removed sections with new drywall and secure them in place with screws or nails.
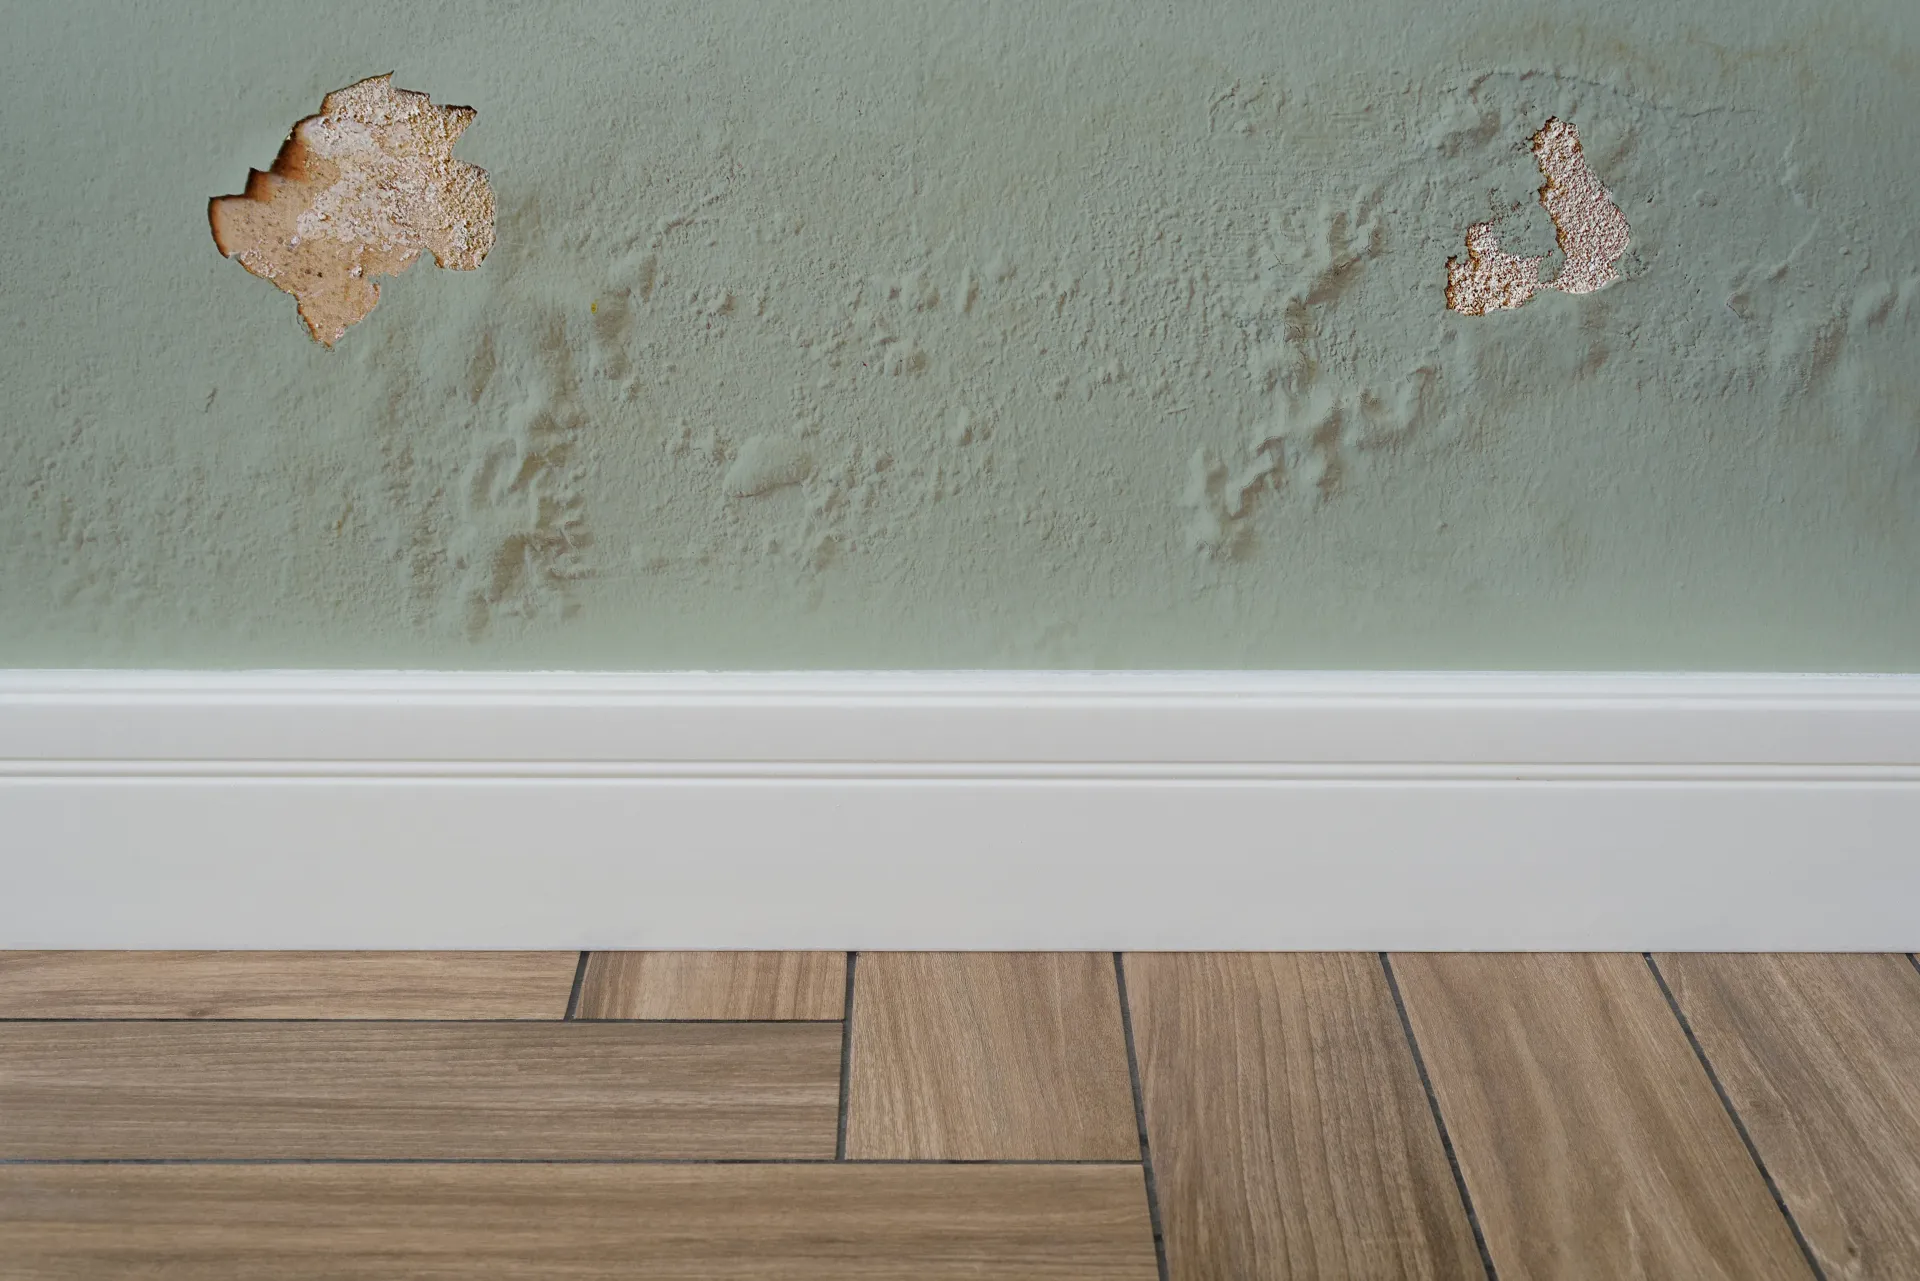
Preventing Mold Growth
Mold spores can quickly grow on damp drywall. Use mold inhibitors and cleaning solutions to disinfect the area and prevent mold growth. Apply a mold inhibitor to the affected areas before the drywall dries completely.
This will help prevent mold spores from taking hold and spreading. Regularly inspect the area for signs of mold and take immediate action if any is detected.
Ensuring Structural Integrity
Check the structural integrity of the wall after drying. Ensure that no significant damage has compromised the wall's strength. Look for signs of warping, swelling, or other structural issues that may have been caused by the water damage.
If you notice any structural problems, consult a professional to assess and repair the damage.
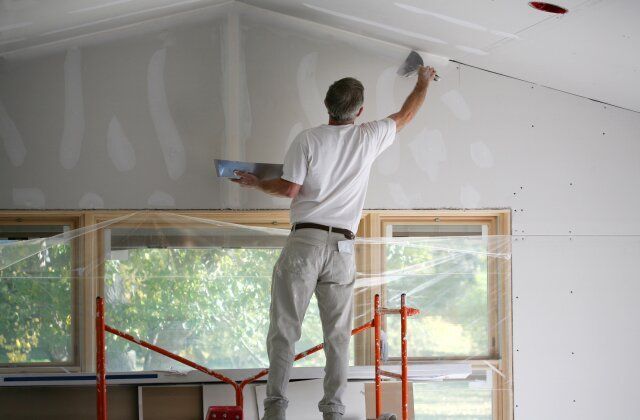
Repairing Drywall
Once the drywall is dry, repair any damaged sections. Use drywall repair techniques to patch holes and smooth out the surface. Apply a joint compound to fill in any cracks or holes, and sand the surface smooth once it has dried.
Prime and paint the repaired areas to match the rest of the wall, ensuring a seamless finish.
Final Inspection and Cleanup
Conduct a final inspection to ensure all moisture is removed and the drywall is completely dry. Clean up the area and dispose of any damaged materials properly.
Check for any remaining signs of water damage, wet drywall or mold growth, and take any necessary steps to address these issues. Be thorough and use proper equipment like a moisture meter.
Preventative Measures for Future Leaks
Implement preventative measures to avoid future leaks. Regularly inspect plumbing systems, ensure proper ventilation, and maintain low indoor humidity levels.
Install moisture barriers in areas prone to leaks, such as basements and bathrooms. Consider using water leak detection devices to alert you to any potential issues before they become significant problems.
Importance of Regular Maintenance
Regular maintenance is key to preventing future leaks and ensuring that your drywall remains in good condition. Regularly check your home for signs of moisture issues, such as damp spots or peeling paint.
Address any issues promptly to prevent further damage. Keeping your home well-maintained can save you time and money in the long run by preventing costly repairs.
The Role of Professional Help
While many drying and repair tasks can be handled by homeowners, there are times when professional help is necessary. If you are dealing with extensive water damage or mold growth, it is best to consult a professional restoration company.
Professionals have the tools and expertise to handle severe water damage and ensure that your home is properly dried and restored.
Tips for Homeowners
As a homeowner, there are several steps you can take to minimize the risk of water damage to your drywall. Ensure that your home's gutters and downspouts are clean and functioning properly to direct water away from your home's foundation.
Install sump pumps in basements to prevent flooding and use a dehumidifier in areas prone to high humidity. Regularly inspect your home's plumbing for leaks or any more moisture and address any issues promptly.
Choosing the Right Equipment
Having the right equipment on hand can make a significant difference in your ability to effectively dry wet drywall after a leak. This is why seeking help from a professional restoration company can be the best option, as they have access to high-quality equipment specifically designed to handle major water damage.
Safety Precautions
Safety should always be a priority when dealing with water damage. Wear protective gear, such as gloves and masks, to avoid exposure to mold and other contaminants. Ensure that the area is well-ventilated and avoid using electrical equipment in wet areas to prevent electrical hazards.
Conclusion
Regular inspections and preventative measures can help you avoid future leaks and keep your home safe and dry. Remember, acting quickly and using the right tools and techniques is key to effectively managing water damage in wet drywall and protecting your investment in your home.